Do you need to:
These are some of the many automation capabilities of Process Lasso! Take control of your PC through your own manual rules or let Process Lasso’s automated algorithms do it for you. With Process Lasso, you can run processes *your* way.
Process Lasso’s automation capabilities include:
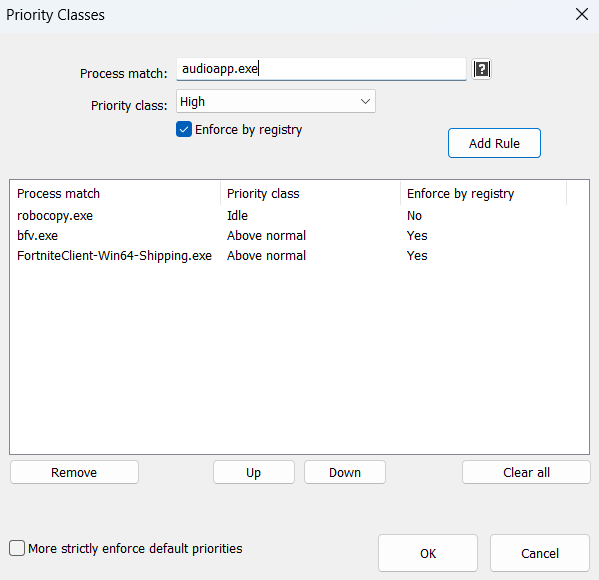
Persistent CPU Priority Classes are available to keep applications running at specific priorities.
Note that use of above-normal priority classes is generally ineffectual at improving performance (it won’t make an app go faster). Instead, it is recommended to target problematic background processes with Below Normal and Idle priority classes to limit their impact on performance sensitive applications. This is what ProBalance does automatically.
Priority classes available in Windows are:
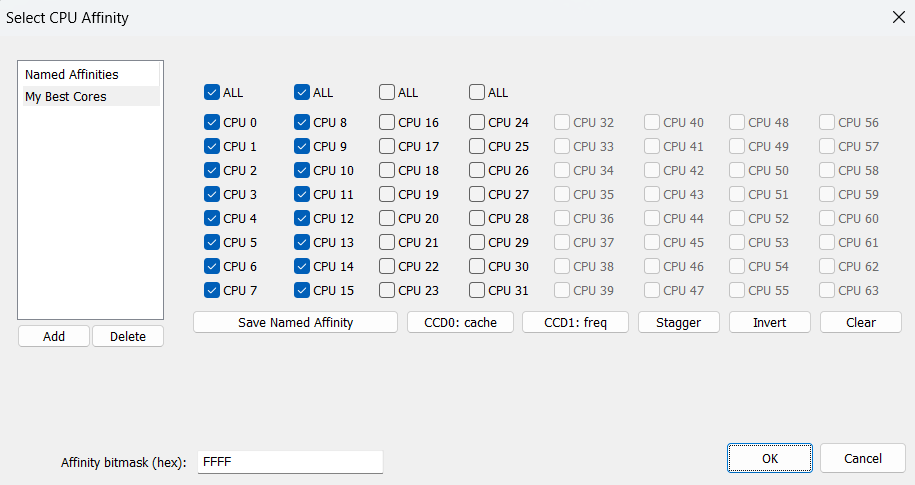
CPU Affinities control which CPU cores a process is allowed to use. Its threads will only be scheduled to that set of CPUs. This is useful to limit max CPU consumption of a process, or to optimize which CPU cores are dedicated to specific apps, games or services. If you want to instead dynamically reduce the set of CPU cores a process has access to in order to limit CPU use, try the CPU Limiter.
The optional ‘Delay’ field specifies how many seconds after process startup to apply the CPU affinity. In some cases, games or apps may be sensitive to CPU affinity changes during their startup phase, and this is intended to mitigate that. Another use is to give a process access to the full CPU while it is loading, then restrict it
Multi-group (>64 logical CPU cores) processes have system restrictions on CPU affinities. Process Lasso will make a best effort to move threads to your chosen CPU affinity, but new threads of a process won’t be constrained to the desired CPU affinity without continuous reapplication of the affinity. Process Lasso will do this automatically if you create a persistent CPU affinity rule. However, you may instead want to use the CPU Sets feature, a weaker form of CPU affinity, since it does not have these multi-group restrictions.
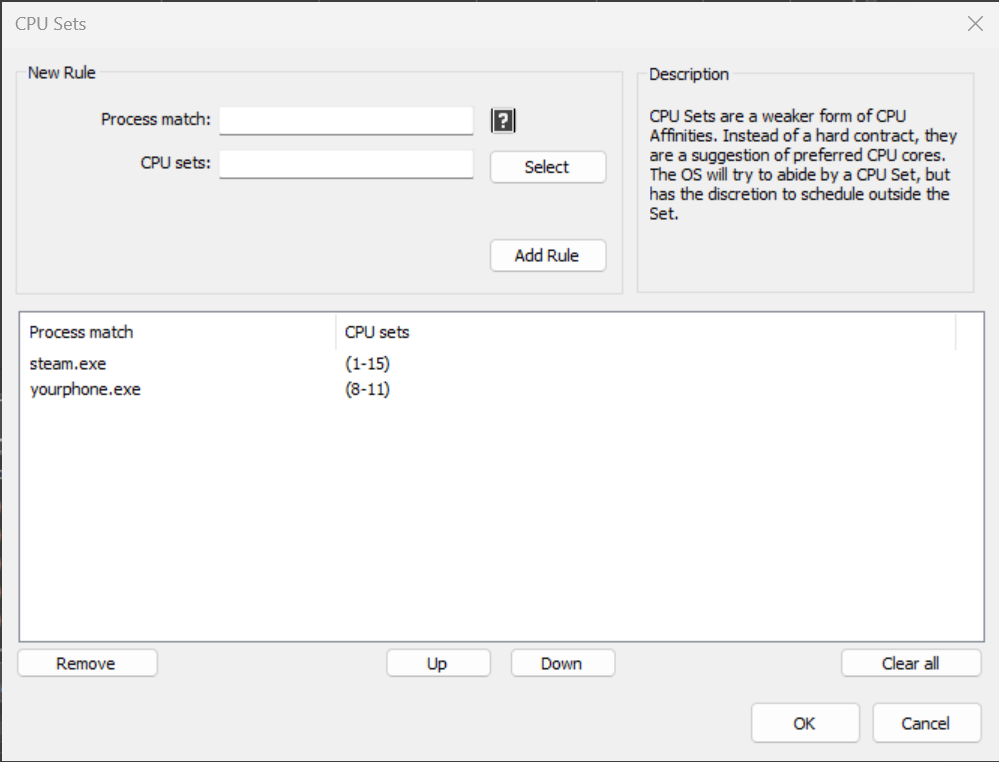
CPU Sets, a native Windows feature, are a ‘softer’ form of CPU Affinities. Instead of a hard contract, they are a suggestion of preferred CPU cores. The OS will try to abide by a CPU Set, but has discretion to schedule outside the Set. This may be necessary when the thread load exceeds the number of cores in the Set, or for power management reasons.
CPU Sets give the OS thread scheduler more flexibility than CPU Affinities do. If a process with a CPU Sets rule needs more CPU(s) to handle its thread load, the OS can schedule onto CPUs outside the assigned Sets. In contrast, a CPU Affinity can not be violated, so the process’s compute would be limited. Therefore, for performance tuning, CPU Sets are usually preferred. For hard limits on CPU consumption, traditional CPU Affinities should be used.
Some apps and games are sensitive to CPU Affinity changes. In these cases, CPU Sets are a viable alternative since they are less likely to cause complications.
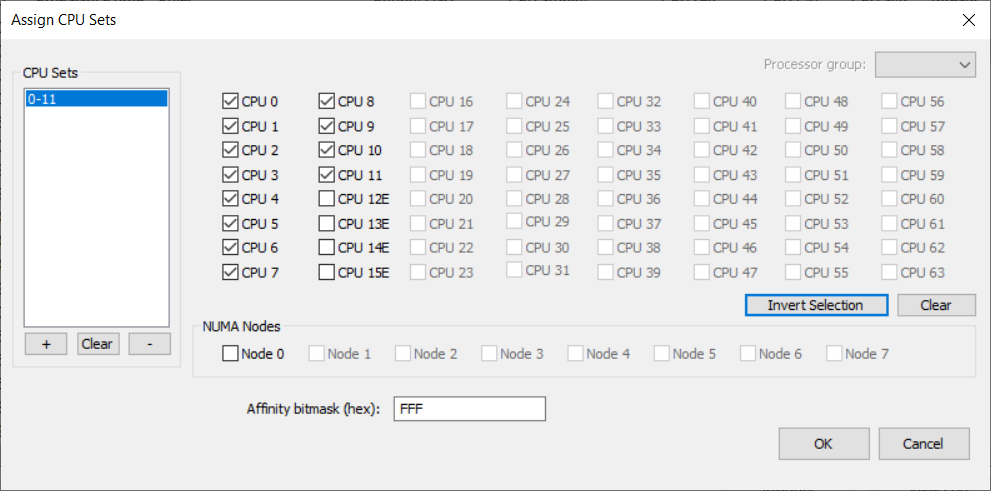
On Intel 12th Gen CPUs (Alder Lake), CPU Sets can be used to signal the OS to only utilize Performance (P) or Efficient (E) cores, or some mix of each, for a process. Many users will find CPU Sets an ideal method to disable E-cores for select applications.
On systems with more than 64 logical CPU cores, where Windows uses processor groups, a process’s CPU Sets may span multiple processor groups. Therefore, you will add multiple sets to the CPU Sets to span more than one group. That’s what the left-most list is for. Use the ‘+’ button under the left ‘CPU Sets’ list. Then select another processor group from the dropdown in the upper-right. Select the CPUs from that group to add a second CPU Set. That is why the term ‘CPU Sets’ is plural, because you can specify more than one set!
Persistent (Sticky) CPU Sets are fully supported by Process Lasso.
Read more about CPU Sets at MSDN.
Efficiency Mode, introduced in Windows 11, provides a signal to the operating system that a process is not time-critical, and can therefore be deprioritized in relation to other processes, run at a lesser clock speed and/or on efficient cores, if available.
Although this was a welcome addition to Windows, there was no way to persist the setting – until now. With Process Lasso, users can now persist Efficiency Mode ON or OFF for specific processes. The OFF setting is useful for processes that get inappropriately classified as efficient. For instance, you may want to ensure that Efficiency Mode is OFF for a performance critical process. This will keep Windows from scheduling it to E-cores and/or taking other energy saving actions.
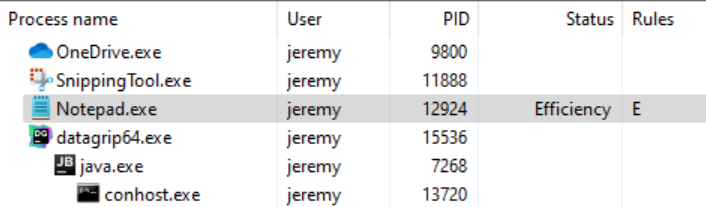
So that users can know which running processes are in Efficiency Mode, we added an indicator to the Status column, and moved its default position farther left. The ‘Running’ status shown in previous versions is now implied, so the field will be blank if there’s no other notable status. Therefore, the process status may now be any combination of those listed below. Meanwhile, in the Rules column, the symbols indicating Efficiency Mode always ON or OFF are ‘E’ and ‘e’, respectively.
Status column values:
Rules column symbols:
Importantly, some processes will have individual threads classified as efficient, rather than the whole process, and that won’t currently be reflected in Process Lasso. In these cases, setting an Efficiency Mode OFF rule will ensure that no threads in the process are classified as efficient.
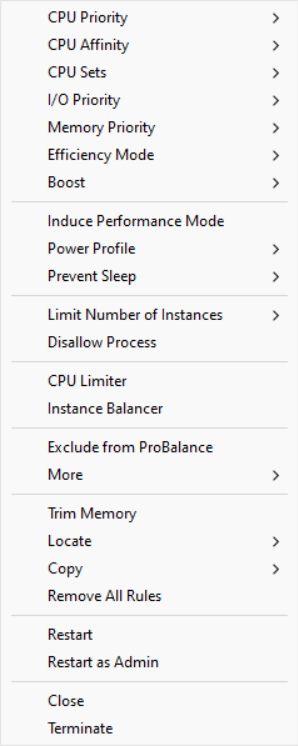
Users can set Efficiency Mode for a running process by using the context menu, for either the current instance only, or every time that process is run (the ‘always’ submenu).
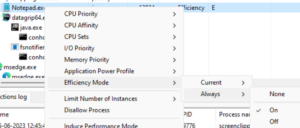
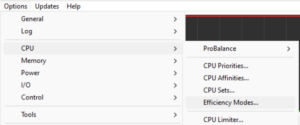
The Efficiency Mode rules can be managed at app menu item ‘Options / CPU / Efficiency Modes…‘.

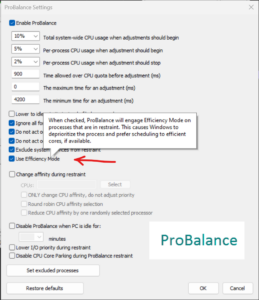
We’ve also tied Efficiency Mode into ProBalance, with a new option to turn on Efficiency mode while a process is being acted on by ProBalance. The option defaults to OFF because Efficiency mode is much more heavy-handed than ProBalance’s stock behavior.
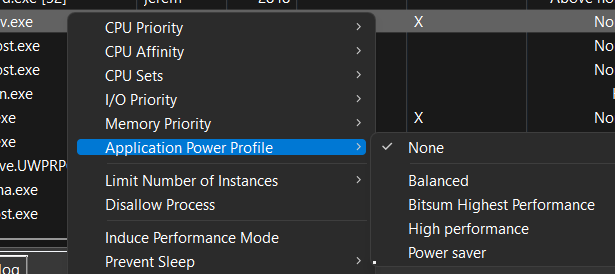
The user can create rules to that cause the system to enter the chosen power plan when specified processes are running. When they terminate, the system is returned to the previous power plan. This lets users target their system power plan to specific applications. You can do this by right-clicking on a process, using the ‘Application power profile‘ submenu, or by the menu option at ‘Options / Power / Application Power Profiles …”.
This option allows you to specify the power plan that the system should be in both when Process Lasso first starts (before any rule enforcement), and when there are no power rules active. It is useful to prevent cases where the system ends up in an undesired power plan due to conflicting simultaneously active power rules or external changes to the power plan.
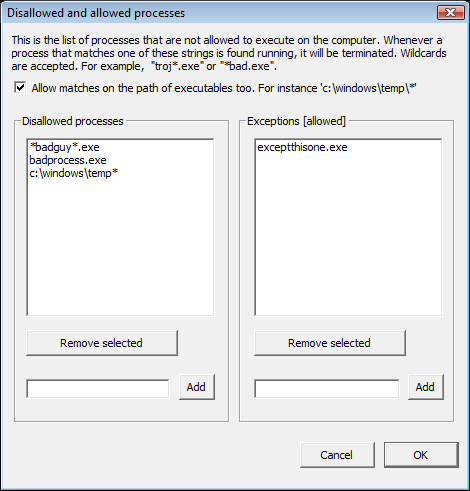
The processes listed here will get terminated when they are found to be running. Process Lasso can not (at present) actually prevent them from trying to start up, it just immediately terminates them when it finds them running.
Foreground Boosting will raise the priority class of the process currently in the foreground. Windows already does a foreground priority boost, and further boosting is usually not effective. ProBalance works in the opposite direction, lowering the priority class of problematic background processes, for a reason. Still, Foreground Boosting can be useful in some environments, and on Alder Lake is an easy way to signal to the Windows scheduler that the foreground process should prefer P-cores.
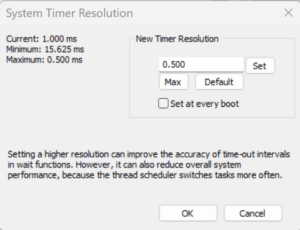
The System Timer Resolution tool allows for persisting user adjustment of the system timer resolution in up to 0.5ms increments.
From MSDN:
Prior to Windows 10, version 2004, this function affects a global Windows setting. For all processes Windows uses the lowest value (that is, highest resolution) requested by any process. Starting with Windows 10, version 2004, this function no longer affects global timer resolution. For processes which call this function, Windows uses the lowest value (that is, highest resolution) requested by any process. For processes which have not called this function, Windows does not guarantee a higher resolution than the default system resolution.
Starting with Windows 11, if a window-owning process becomes fully occluded, minimized, or otherwise invisible or inaudible to the end user, Windows does not guarantee a higher resolution than the default system resolution. See SetProcessInformation for more information on this behavior.
Setting a higher resolution can improve the accuracy of time-out intervals in wait functions. However, it can also reduce overall system performance, because the thread scheduler switches tasks more often. High resolutions can also prevent the CPU power management system from entering power-saving modes. Setting a higher resolution does not improve the accuracy of the high-resolution performance counter.
timeBeginPeriod function (timeapi.h) – Win32 apps | Microsoft Learn
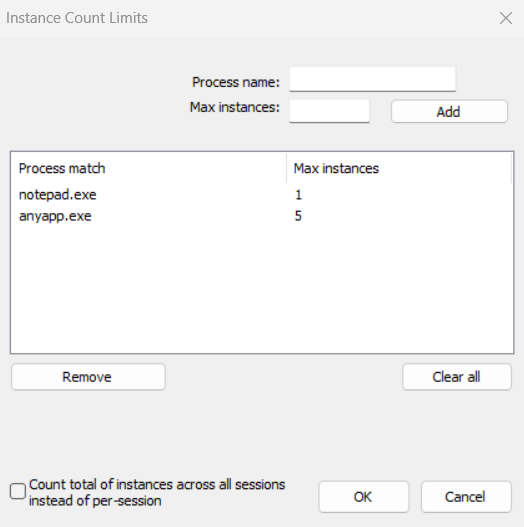
The user can limit the number of instances of a process allowed to be running at the same time (per user session) with this dialog. New instances of processes will be terminated if they match a pattern here and the number of instances is already equal to, or greater than, the instance count limit.
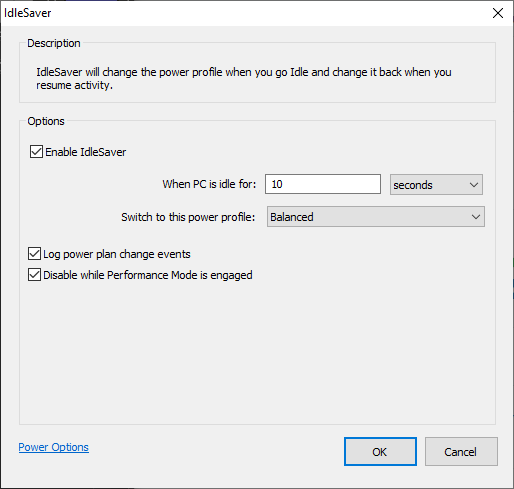
IdleSaver allows the user to set a power plan for use when the system is Idle. This allows the user to run in a high performance power plan while active, but without completely sacrifice energy savings by switching to a more conservative power plan when the user is idle.
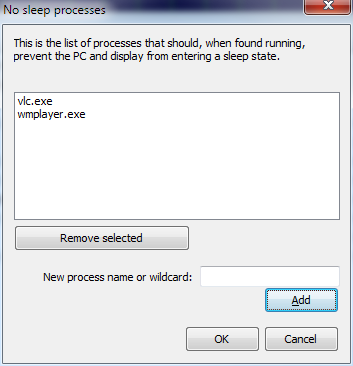
The user can prevent the PC and display from entering a sleep or hibernate state by adding them to the ‘anti-sleep’ list. This can be done by right-clicking on a process, using the ‘When running’ menu, or by using application menu option at ‘Options / Configure Anti-Sleep processes …’.